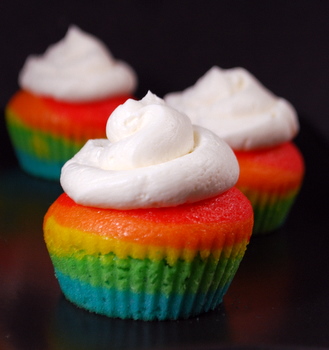
These rainbow cupcakes are, hands down, some of the cutest cupcakes I’ve made in a very long time. The colors make the cupcakes vibrant and fun – and, frankly, they’re just too cute NOT to eat!
Although they look complicated, the cupcakes are actually very easy to make. First, you need to mix up the batter for plain vanilla or white cupcakes. Divide it evenly into 5 small bowls, then add a generous amount of food coloring to each one to create the batters for the red, orange, yellow, green and blue layers. Vibrant colors are the best thing about these cupcakes, so don’t be afraid to add a little bit extra food coloring if you don’t think that yours are strong enough. The colors should be added to the cupcake cups one at a time, working one spoonful at a time. It’s a little tedious when you compare it to a single-color cupcake, but it still only takes a few minutes to get everything into the pans.
I used a cupcake recipe that calls for oil, instead of butter, and has a fairly thin batter. I like to use this cupcake recipe for a few different reasons. First, the cupcakes are very moist. Second, since there is a relatively high ratio (compared to some, but not all other cupcake recipes) of fat to flour, you don’t need to worry too much about overmixing and making the cupcakes tough when you stir in the color. Finally, these cupcakes don’t brown too much in the oven, letting those rainbow colors really shine through. I also did not use paper liners for these cupcakes so that their colors would immediately be apparent when you looked at them. Paper liners will work fine, of course, but I would opt to grease the pan and go without, or to use silicone cupcake liners instead.
Although it has nothing to do with the color, it’s also worth mentioning that these are not too sweet, so you can pile on the frosting to top off the rainbows.
Rainbow Cupcakes
1 cup all purpose flour
1 1/2 tsp baking powder
1/4 tsp salt
1/2 cup sugar
2 large eggs
1/2 cup vegetable oil (or melted butter)
1/2 cup buttermilk
1 tsp vanilla extract
red, yellow, green and blue food colorings
Preheat oven to 350F. Grease 10 cups from a 12 cup muffin tin (or line with paper cups).
In a medium bowl, whisk together flour, baking powder and salt.
In a large bowl, whisk together sugar, eggs, vegetable oil, buttermilk and vanilla extract. Pour in dry ingredients and stir until just combined.
Divide batter evenly into 5 small bowls; each should have a little more than 1/3 cup batter (approx 6 tbsp or so for each).
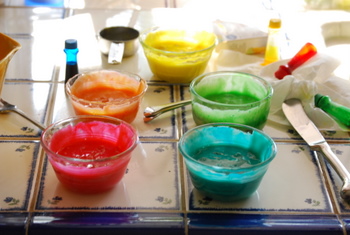
Add about 1/2 tsp food coloring to each bowl to make red, orange, yellow, green and blue batters. Stir well, so no streaks of plain batter remain. Add additional food coloring if necessary.
Starting with the blue batter, add a small spoonful to each of the 10 grease muffin cups (just over 1/2 tbsp in each). Repeat with all remaining colors, working from green to yellow to orange to red, adding each subsequent spoonful on top of the previous color. Do not attempt to spread the layers of color out (as it can cause layers to combined), but allow them to spread on their own.
Bake for about 15 minutes, until a toothpick inserted into the center comes out clean.
Cool cupcakes on a wire rack before frosting.
Makes 10
Quick Buttercream Frosting
1/2 cup butter, room temperature
3 tbsp milk
1 tsp vanilla extract
approx 3 cups confectioners’ sugar
In a large bowl, beat together butter, milk and vanilla. Gradually add in the confectioners sugar until frosting reaches a thick, spreadable consistency. You will probably use 2 1/2-3 cups.
Pipe or spread frosting onto cooled cupcakes.

 You can make it with any type of fruit and jello. Strawberry, orange, peach and raspberry are our favorites.


