 1/2 cup butter, room temperature
Saturday, May 28, 2011
Smores Cookie Bars
 1/2 cup butter, room temperature
Thursday, May 5, 2011
Lemon Drop Cookies

Lemon Drop Cookies
2 cups sugar
1 1/2 cups butter flavored shortening
3 eggs
2 teaspoons vanilla
1 teaspoon lemon extract
4 cups flour
1 1/2 teaspoons baking soda
1 1/2 teaspoons baking powder
1 teaspoon salt
Grated or finely chopped zest of one lemon
1 (6-oz) package lemon drops
Glaze:
2 cups powdered sugar
juice of two lemons (about 4-5 Tablespoons) - (You can use less if you want your glaze a little thicker)
Preheat oven to 350 degrees. In mixing bowl cream sugar, shortening, and eggs; then add vanilla and lemon extract. Stir in flour, baking soda, baking powder, and salt. Crush lemon drops in blender or food processor. Add lemon zest and crushed lemon drops; mix well. Roll into balls, flatten slightly with your hand, and bake on a parchment lined cookie sheet (You must use parchment here to avoid sticking).
Bake for 10 to 12 minutes. Let cool slightly on pan for a couple of minutes. Make the glaze by mixing powdered sugar with lemon juice to desired consistency. Brush glaze over cookie tops after cookies have cooled slightly. If the cookies are too hot the glaze will just melt off. Let cookies cool completely. ENJOY!
Makes 4 to 5 dozen cookies.
Tuesday, April 19, 2011
Creamy Fruit Salad

 You can make it with any type of fruit and jello. Strawberry, orange, peach and raspberry are our favorites.
1 Small Package Orange Jello
1 Small Package Cook and Serve Vanilla Pudding
2 C. Water
Mandarin Oranges
1 Small Cool whip
Mix together jello, pudding and water in saucepan. Cook until it thickens. Boil 1 minute. Set in fridge overnight or until set and cool. Mix with mixer one small bowl of cool whip. Whip until creamy. Stir in oranges.
Rainbow Cupcakes
These rainbow cupcakes are, hands down, some of the cutest cupcakes I’ve made in a very long time. The colors make the cupcakes vibrant and fun – and, frankly, they’re just too cute NOT to eat!
Although they look complicated, the cupcakes are actually very easy to make. First, you need to mix up the batter for plain vanilla or white cupcakes. Divide it evenly into 5 small bowls, then add a generous amount of food coloring to each one to create the batters for the red, orange, yellow, green and blue layers. Vibrant colors are the best thing about these cupcakes, so don’t be afraid to add a little bit extra food coloring if you don’t think that yours are strong enough. The colors should be added to the cupcake cups one at a time, working one spoonful at a time. It’s a little tedious when you compare it to a single-color cupcake, but it still only takes a few minutes to get everything into the pans.
I used a cupcake recipe that calls for oil, instead of butter, and has a fairly thin batter. I like to use this cupcake recipe for a few different reasons. First, the cupcakes are very moist. Second, since there is a relatively high ratio (compared to some, but not all other cupcake recipes) of fat to flour, you don’t need to worry too much about overmixing and making the cupcakes tough when you stir in the color. Finally, these cupcakes don’t brown too much in the oven, letting those rainbow colors really shine through. I also did not use paper liners for these cupcakes so that their colors would immediately be apparent when you looked at them. Paper liners will work fine, of course, but I would opt to grease the pan and go without, or to use silicone cupcake liners instead.
Although it has nothing to do with the color, it’s also worth mentioning that these are not too sweet, so you can pile on the frosting to top off the rainbows.
Rainbow Cupcakes
1 cup all purpose flour
1 1/2 tsp baking powder
1/4 tsp salt
1/2 cup sugar
2 large eggs
1/2 cup vegetable oil (or melted butter)
1/2 cup buttermilk
1 tsp vanilla extract
red, yellow, green and blue food colorings
Preheat oven to 350F. Grease 10 cups from a 12 cup muffin tin (or line with paper cups).
In a medium bowl, whisk together flour, baking powder and salt.
In a large bowl, whisk together sugar, eggs, vegetable oil, buttermilk and vanilla extract. Pour in dry ingredients and stir until just combined.
Divide batter evenly into 5 small bowls; each should have a little more than 1/3 cup batter (approx 6 tbsp or so for each).
Add about 1/2 tsp food coloring to each bowl to make red, orange, yellow, green and blue batters. Stir well, so no streaks of plain batter remain. Add additional food coloring if necessary.
Starting with the blue batter, add a small spoonful to each of the 10 grease muffin cups (just over 1/2 tbsp in each). Repeat with all remaining colors, working from green to yellow to orange to red, adding each subsequent spoonful on top of the previous color. Do not attempt to spread the layers of color out (as it can cause layers to combined), but allow them to spread on their own.
Bake for about 15 minutes, until a toothpick inserted into the center comes out clean.
Cool cupcakes on a wire rack before frosting.
Makes 10
Quick Buttercream Frosting
1/2 cup butter, room temperature
3 tbsp milk
1 tsp vanilla extract
approx 3 cups confectioners’ sugar
In a large bowl, beat together butter, milk and vanilla. Gradually add in the confectioners sugar until frosting reaches a thick, spreadable consistency. You will probably use 2 1/2-3 cups.
Pipe or spread frosting onto cooled cupcakes.
Rainbow Cupcakes
These rainbow cupcakes are, hands down, some of the cutest cupcakes I’ve made in a very long time. The colors make the cupcakes vibrant and fun – and, frankly, they’re just too cute NOT to eat!
Although they look complicated, the cupcakes are actually very easy to make. First, you need to mix up the batter for plain vanilla or white cupcakes. Divide it evenly into 5 small bowls, then add a generous amount of food coloring to each one to create the batters for the red, orange, yellow, green and blue layers. Vibrant colors are the best thing about these cupcakes, so don’t be afraid to add a little bit extra food coloring if you don’t think that yours are strong enough. The colors should be added to the cupcake cups one at a time, working one spoonful at a time. It’s a little tedious when you compare it to a single-color cupcake, but it still only takes a few minutes to get everything into the pans.
I used a cupcake recipe that calls for oil, instead of butter, and has a fairly thin batter. I like to use this cupcake recipe for a few different reasons. First, the cupcakes are very moist. Second, since there is a relatively high ratio (compared to some, but not all other cupcake recipes) of fat to flour, you don’t need to worry too much about overmixing and making the cupcakes tough when you stir in the color. Finally, these cupcakes don’t brown too much in the oven, letting those rainbow colors really shine through. I also did not use paper liners for these cupcakes so that their colors would immediately be apparent when you looked at them. Paper liners will work fine, of course, but I would opt to grease the pan and go without, or to use silicone cupcake liners instead.
Although it has nothing to do with the color, it’s also worth mentioning that these are not too sweet, so you can pile on the frosting to top off the rainbows.
Rainbow Cupcakes
1 cup all purpose flour
1 1/2 tsp baking powder
1/4 tsp salt
1/2 cup sugar
2 large eggs
1/2 cup vegetable oil (or melted butter)
1/2 cup buttermilk
1 tsp vanilla extract
red, yellow, green and blue food colorings
Preheat oven to 350F. Grease 10 cups from a 12 cup muffin tin (or line with paper cups).
In a medium bowl, whisk together flour, baking powder and salt.
In a large bowl, whisk together sugar, eggs, vegetable oil, buttermilk and vanilla extract. Pour in dry ingredients and stir until just combined.
Divide batter evenly into 5 small bowls; each should have a little more than 1/3 cup batter (approx 6 tbsp or so for each).
Add about 1/2 tsp food coloring to each bowl to make red, orange, yellow, green and blue batters. Stir well, so no streaks of plain batter remain. Add additional food coloring if necessary.
Starting with the blue batter, add a small spoonful to each of the 10 grease muffin cups (just over 1/2 tbsp in each). Repeat with all remaining colors, working from green to yellow to orange to red, adding each subsequent spoonful on top of the previous color. Do not attempt to spread the layers of color out (as it can cause layers to combined), but allow them to spread on their own.
Bake for about 15 minutes, until a toothpick inserted into the center comes out clean.
Cool cupcakes on a wire rack before frosting.
Makes 10
Quick Buttercream Frosting
1/2 cup butter, room temperature
3 tbsp milk
1 tsp vanilla extract
approx 3 cups confectioners’ sugar
In a large bowl, beat together butter, milk and vanilla. Gradually add in the confectioners sugar until frosting reaches a thick, spreadable consistency. You will probably use 2 1/2-3 cups.
Pipe or spread frosting onto cooled cupcakes.
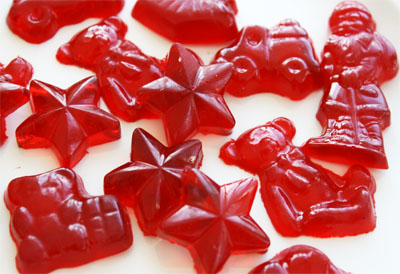
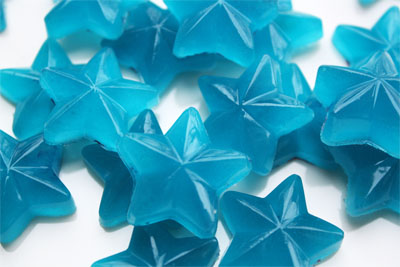
Homemade Gummi Candy
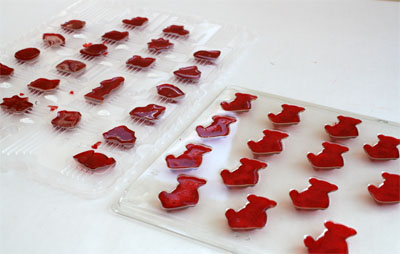
All we needed was 1 -3 oz box of flavored gelatin and 2 - 1/4 oz packages of unflavored gelatin, water and candy molds. (we used two candy molds)
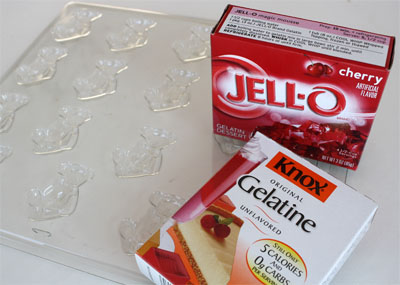 Place 1/3 cup water in a small sauce pan. Sprinkle the Jello and unflavored gelatin over the water. Let sit 5 - 10 minutes. (If you like chewier gummi candy add in another packet of unflavored gelatin.)
Place sauce pan over medium heat and stir until gelatin is dissolved, about 2-5 minutes. When mixture is liquid and all gelatin has dissolved, remove from heat. Let cool a minute and then pour into a container that is easy to pour from. I use a small ceramic creamer pitcher.
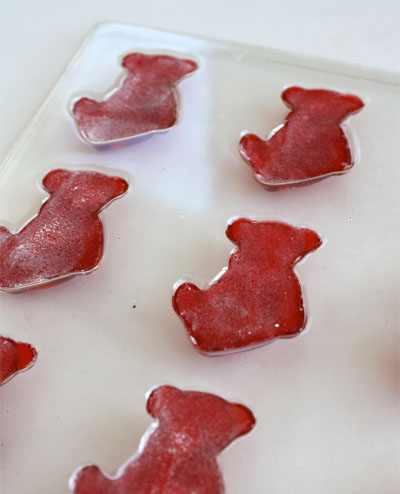
Fill molds.
Allow to cool completely, about 20 minutes. They may be placed in a refrigerator for about 10 minutes if the kids are eager.
Once cool, the backs can be lightly dusted with corn starch, if desired.
Peel the gummi candy out of the molds. Don't be shy, you won't hurt them when peeling them from the molds. No need to oil the molds!
Enjoy!
Oreo Cookies

- 1 box Devils food cake mix (or any other chocolaty kind)
- 2 eggs
- 3/4 cup shortening
- Mix ingredients together.
- Roll into long lengths like a giant tootsie roll. Slice in one inch intervals or as big as you want the cookies to be.
- Roll into balls (or keep flat, it works too).
- Place on non-greased cookie sheet.
- Bake at 350 degrees for 9-10 minutes.
- When cool, put frosting on the back of one cookie and sandwich with another cookie.
- 1/3 cup butter, slightly softened
- 2 cups powdered sugar
- 1/2 tsp. vanilla
- 1-2 Tbs. cold milk or cream
- Beat butter several minutes with mixer until creamy.
- Add sugar, about 1/2 cup at a time, beating well with each addition.
- Add vanilla, then milk or cream and beat well again to the right consistency.
**I like to keep mine in the fridge in a sealed container to keep the frosting set and so the cookies aren't too crumbly. Just get them out of the fridge at the beginning of lunch and by the time everyone's done with their sandwich, they are perfect!
Oreo Stuffed Chocolate Chip Cookies

Oreo Stuffed Chocolate Chip Cookies
2 sticks softened butter
3/4 Cup packed light brown sugar
1 Cup granulated sugar
2 large eggs
1 Tablespoon pure vanilla
3 1/2 Cups all purpose flour
1 teaspoon salt
1 teaspoon baking soda
10 oz bag chocolate chips
1 bag Oreo Cookies, I used the double stuff ![]()
1. Preheat oven to 350 degrees F. In a stand or electric mixer cream butter and sugars until well combined. Add in eggs and vanilla until well combined.
2. In a separate bowl mix the flour, salt and baking soda. Slowly add to wet ingredients along with chocolate chips until just combined. Using a cookie scoop take one scoop of cookie dough and place on top of an Oreo Cookie. Take another scoop of dough and place on bottom of Oreo Cookie. Seal edges together by pressing and cupping in hand until Oreo Cookie is enclosed with dough. Place onto a parchment or silpat lined baking sheet and bake cookies 9-13 minutes or until cookies are baked to your liking. Let cool for 5 minutes before transferring to cooling rack. Serve with a tall glass of milk, enjoy!
Makes about 2 dozen VERY LARGE Cookies ![]()
Chicken Stuffed Baked Potatoes

Chicken, Bacon, Avacodo Sandwich

3-4 chicken breasts
1 cans chicken broth
2 tablespoons Montreal Steak Seasoning
1 Loaf of French Bread
Ranch Dressing
4 slices of bacon
1 Avocado sliced
1 Tomato sliced
1 cup shredded cheese
Cook in crock pot on high for four hours with chicken broth and Montreal Steak Seasoning
(feel free to add more chicken, chicken broth and Steak Seasoning for future dinners)
It is easier for me to shred the chicken in the crock pot so that it soaks up all the marinade. Chicken freezes well for future meals!
Cut French bread loaf long ways in half.
Spread Ranch dressing on both sides of the loaf.
then add layers...chicken, bacon, cheese, tomato and avocado.
Bake at 375 for 10 minutes, and then I like to broil it for another 2 minutes. Slice and serve.
Sunday, January 30, 2011
Cilantro Lime Tomatillo Ranch Dressing
- 1 buttermilk ranch dressing packet
- 1/2 cup buttermilk
- 1/2 cup sour cream
- 4 tomatillos(husks removed)
- 1 large clove of garlic
- zest and juice of 1 lime
- large bunch of cilantro
- 1/2 jalapeno pepper(more or less depending on the heat level you like)
Directions: Put all ingredients into food processor or blender and blend away until smooth and creamy. I usually don't have buttermilk, so I put 1 T vinegar into measuring cup and add milk to the 1/2 cup mark.
Cafe Rio Burrito

Ingredients:
3 lb Pork Roast
1 can Dr. Pepper
1 cup brown sugar
1 cup salsa
1 teaspoon garlic powder
1 teaspoon ground mustard
salt and pepper
Place pork in the crock pot. Then add all ingredients. Cook on low for 6-8 hours. Shred pork with about an hour left to cook.
1 can black or pinto beans, rinsed and drained
1 can red enchilada sauce
Cilantro
Mexican style cheese
Tortillas
Rice
Wednesday, January 26, 2011
Strawberry Creme Puff Cake

2 cups or one carton of strawberries, sliced
Cream Puff Base:
5 tablespoons butter
2/3 cup water
1 tablespoon sugar
2/3 cup flour
3 eggs
Cream Cheese Mixture:
4 ounces cream cheese, softened
1 teaspoon fresh orange zest
1/2 teaspoon vanilla
1 cup heavy whipping cream
2/3 cup powdered sugar
Using an offset spatula, spread the mixture on the bottom and one inch up the sides of the prepared pan. Don't look at my picture. I skimmed the instructions and put it 2 inches up the side instead of one. This part can be tricky. I've found sometimes it's easier to spread with clean hands.
Bake for 25 minutes. Remove from the oven and prick pastry with a toothpick 10-12 times. Return to the oven and bake 5-10 minutes more until golden brown but not overbaked (you can insert a toothpick into the center and if it comes out with sticky dough, it still needs longer in the oven). Cool completely.
Top with fresh sliced strawberries. Keep in the fridge until serving. My strawberries weren't that sweet so I put the sliced strawberries in the fridge with a couple tablespoons of sugar for an hour and they made their own sauce.
Breakfast Casserole

12 slices of bread
Chicken and Guacamole Tostadas

Ingredients
- 1 ripe peeled avocado
- 1 cup plus 2 tablespoons finely chopped tomato, divided
- 3 tablespoons minced fresh onion, divided
- 3 tablespoons fresh lime juice, divided
- 1/2 teaspoon salt, divided
- 1 small garlic clove, minced
- 1 tablespoon chopped fresh cilantro
- 1 tablespoon minced seeded jalapeño pepper
- 2 cups shredded skinless, boneless rotisserie chicken breast
- 1/4 teaspoon smoked paprika
- 8 (6-inch) corn tostada shells
Preparation
1. Place avocado in a small bowl; mash with a fork. Stir in 2 tablespoons tomato, 1 tablespoon onion, 1 tablespoon juice, 1/4 teaspoon salt, and garlic.
2. Combine remaining 1 cup tomato, 2 tablespoons onion, 1 tablespoon lime juice, 1/4 teaspoon salt, cilantro, and jalapeño; toss well.
3. Combine chicken, remaining 1 tablespoon juice, and paprika; toss well to combine. Spread about 1 tablespoon guacamole over each tostada shell; top each with 1/4 cup chicken mixture and about 2 tablespoons salsa.
